SITE SPECIFIC ART AND SITE SITUATION: – Week 2


SITE SPECIFIC ART AND SITE SITUATION:


During a lecture with Prof. Andre Stitt, I learned a lot about site-specific art and site situation and how spaces and objects within spaces can affect the way individuals behave. This lecture allowed me to successfully define a site as ‘A site represents the constituent physical properties: it’s mass, space, light, duration, location and material processes.’ A site can be located anywhere and can embody art installations which can help or hinder the environment. Most artists who produce site installations often want the public to become socially engaged with their artwork, this can help to increase the cohesion within the community. Artists can use public places to create a space which can encourage the development of different emotional responses; the art created and placed within the place can physical art performances or constructions. I found this lecture incredibly interesting as I learned about a variety of different sub topics alongside the idea of site situation, these included; Activism, Territory, psychogeography and architecture. I learned the different ways these characteristics can impact a space or public place. The amount of interaction which takes place within a space varies depending on the type of place people are in. Spaces such as squares are specifically designed to increase the social cohesion within the community and encourage interaction between individuals therefore can be seen as a social environment. On the contrary, underpasses, hallways and airports are designed to act as a walk way where people can get from one place to another quickly, therefore provides little time for individuals to stop and make conversations with others. Therefore, the amount of social interaction within this space is considerably less than squares.


Below is an image of Queen Mother Square in Poundbury, Dorchester, Dorset- It shows a square which is formed to encourage cohesion within the community and enables social interactions between the locals.

queen mother square .jpg


This is The “Boulevard De Nantes” underpass which is located in Cardiff and connects city hall to the city centre. This place acts as a walkway for individuals and does not promote the ability for individuals to experience social cohesion.

underpass


An example of a piece of artwork which was created in a public place includes a mural created by Jane Mutiny as part of the ‘Paint the streets campaign’. This visual includes images of animals which are very near to extinction and animals of whom are already extinct. This artwork was done to ensure that people stopped and looked at the beautiful animals which are slowly becoming increasingly close to extinction and encourages them to do something about this and help prevent the impacts of climate change. This mural was created as part of the Extinction Rebellion Public Art Programme and has shown me that public art can help to enhance a space that was potentially going through placelessness and encourages people to stop and look at the artwork produced. This makes the place mean something to people and therefore, they are more likely to recognise a place for its distinctive public art or installations thus, embedding a personal attachment of that place within that individual’s mind.

1201Mural by Jane Mutiny. Courtesy the artist.jpg

Lighting

During my summer holidays I captured a few photos of spaces/ lighting which I was drawn to. I was interested in how each space overwhelmed me with a variety of different emotional responses. Lighting is an incredibly important characteristic when designing a space, it can drastically change the atmosphere of the environment you are placed in; enabling the occurrence of a selection of moods and emotions. When a space creates different moods it can impact peoples behavioural responses, stimuli’s like light can also affect your ability to concentrate during the day. In the evenings many people prefer to have ambient lighting as it predominantly symbolises tranquility which is something which many people want during the dark evenings. However, in a space where the individual must focus and concentrate on what they are doing artificial white light would be most applicable.

Ikea room .png                                      
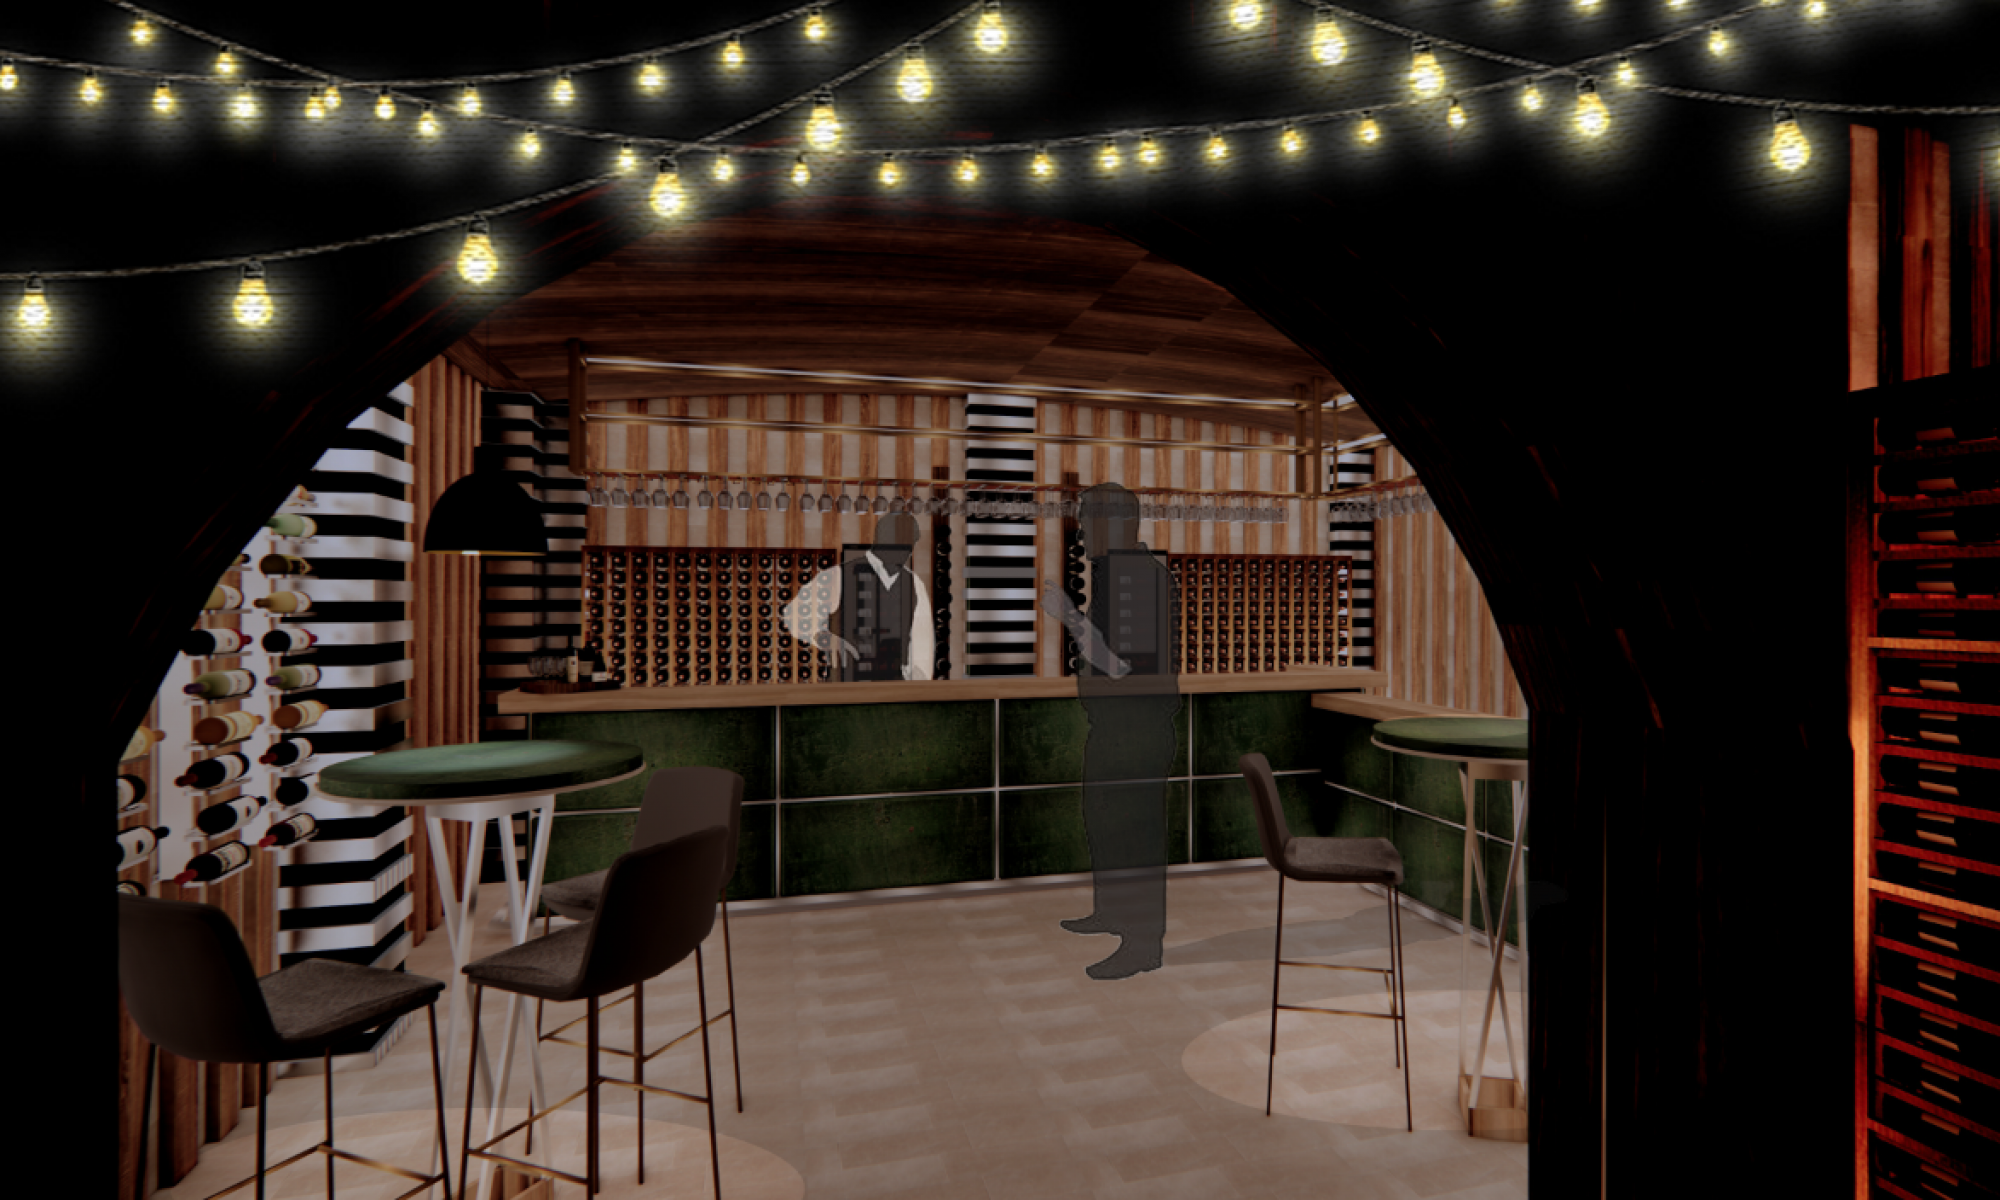
Image taken in an Ikea Showroom

The picture above shows a lovely contrast between the black furniture and textures and the fluorescent bold red lighting. Both these colours complement each other particularly well providing a sense of harmony and tranquility within the space. The bursts of white bold light complements the linear red florescent lighting producing a harmonic atmosphere. On the other hand the bold red lighting could be seen as a scary or dangerous light which can thereby produce a threatening emotion, consequently causing anxious behaviour. This space is very controversial, this is because although it creates a condensed, homely and relaxed environment; the highly concentrated lighting can be too intense for some people and therefore can be quite uncomfortable.


Ikea room 2                Ikea interior show room 2:

This particular interior is the complete opposite to the previous space I analysed, its ambient white lighting provides a calming environment. Within this space I really like the metal frames, I believe this provides additional texture to the space making it feel as though the environment is encompassing you. The large light lanterns which are situated above the wooden table are very aesthetically pleasing. They provide a large amount of ambient light which sets the atmosphere within the space.

End of field EVALUATION

FIELD EVALUATION:


The Object display project was really fun and allowed me to express my creative side more, I enjoyed creating and producing an interior space which could potentially be used within the host building. I believe that this project went really well as I was able to produce a successful outcome for the brief that was presented to us. This implies that I am able to work under pressure to produce a good quality interior within just a few weeks alongside working with all the new software. This has encouraged me and given me the additional confidence to design and create more intricate and successful projects. During object display I came across some problems with my design which needed to be changed immediately for it to work, though this was hard I was able to efficiently change the design to enhance the quality of the interior.

In addition I also think that I fully engaged and committed to this project which had a positive impact on my designs. I really enjoyed producing my first scale model for this project and showed me that I was able to effectively display my ideas through a 3d visual form. I believe that I have managed to compose the elements of object, display and experience within this project alongside my field module. I know this because I was able to efficiently produce an interior space with a specific purpose and place for experience with my object display project. I believe that I have successfully reached my potential for both the object display module and field module, I have worked incredibly hard throughout the project and have been committed to producing work of a very high standard.
Watching everyone’s presentations during the first term has allowed me to gain more understanding into how other students present their ideas. It also enabled me to see other people’s ideas and how they laid out their work which was useful as I was able to recognise the uniqueness of each designer on my course.

To conclude I believe that I fully engaged, committed and attended the field Module. I enjoyed meeting and working with different students from a variety of disciplines and it enabled me to not only improve my confidence and find my own voice but allowed me to listen and acknowledge other people’s views and opinions. All my field projects were incredibly interesting and I obtained additional experience and understanding of different art and design practices. E.g.) I learned how to attach 2 pieces of clay together to form a tight secure bond using indentation and slip. During the 3 weeks my experience working within a team differed from time to time, the first and last week of field were good as both of my groups worked extremely well together, supporting one another as we went along. However in my second week of field my group did not work together as well as expected, though this was disappointing it has made me realise that I was able to deal with the situation I was faced with and still produced a successful project. I am glad that I was put in a group which didn’t collaborate well together and I believe that this experience has allowed me to grow as an interior designer. Working in teams with people I had never met before allowed me to gain more confidence within team situations and has enabled me to find my voice and express my opinion when I feel it is valid.


FINAL OUTCOMES:


FINAL V-RAY RENDER: object display

vray

FINAL 3D MODEL: object display


model pictures


FINAL CERAMICS PIECE: field week 1
ceramics


FINAL PIN HOLE CAMERA: field week 2
decorated pin hole


FINAL VISUALS FOR ‘PLACE FOR EXPERIENCE’ : field week 3

WELCOMING ROOM
welcoming roomTHREATENING ROOM

threatening room

‘Place of Experience’ – Interior Design ( field wk3)

Place of experience:


In my final week of field I was back doing what I was familiar doing; interior design. The brief required us to produce 2 visuals centred around 2 different contradicting words, these could be produced on Photoshop, cut out as a 2d collage or 3d visual (model). This involved looking at colours, textures, tones and mood, allocating the right ones to both interior spaces would ensure that we successfully produced a ‘place for experience’ influenced from the words ‘welcoming and ‘threatening’. After being placed into our groups and given 2 contrasting words we decided to brainstorm different ideas for what we thought the words meant.

As a group we decided that for the ‘Welcoming’ interior we wanted to have a large window with a snowy cold scene outside with a warm fire/ cosy vibe inside which would encourage people to come inside to keep warm. We were inspired by the Danish and Norwegian word ‘Hygge’. This is a word which is a mood for coziness and produces feelings such as wellness and contentment. Therefore perfectly represented the ‘welcoming’ and cosy interior we wanted to produce. For our ‘Threatening’ visual we wanted to create a room which had one single chair in the centre surrounded by each of our fears and phobias e.g.) Clowns, rats, spiders etc. Therefore, the visual became personal to each member of the group.


Welcoming room visual:


welcoming room


Threatening room Visual:


threatening room

I think that as a group we worked incredibly well together using our individual strengths to produce the 2 visuals successfully. I learned additional techniques on Photoshop from other members of the team which has widened my overall understanding of this software and enabled our visuals to be of a high standard. To make this project easier we split into 2 groups, this meant that 3 of us could create the ‘Welcoming’ visual and the other group could produce the ‘Threatening’ Visual, this worked incredibly well for our group dynamics. I was placed into the group which had to produce the welcoming space, as I had worked with Photoshop before I was in charge of editing the visual. This made me slightly nervous as I felt under pressure to produce the visual to a high quality, however my group reassured me along the way that what I was producing was good. The visual took approximately 2 days to complete it involved collating together and arranging different objects within the space to ensure it encompassed the idea of a welcoming or threatening space. Once the visuals were completed we sent the images to the Plotter machine which printed them out on glossy card which enabled the quality of our images to increase.

In addition, we wanted to use our knowledge from our previous Artist designer maker field week and produce an augmented reality of our visuals. Our trigger image for the HP reveal was the ‘welcoming’ visual that we created and the overlay was more interactive with the sound effect of a fire crackling which emphasised the cosy, ‘welcoming’ vibe we wanted to portray. To conclude I am pleased with how well this group has communicated and I feel that even though we came from different disciplines we were able to successfully work as a team. We all listened and acknowledged everyone’s individual opinions and ideas and thereby enabling us to produce 2 great visuals.

Artists Designer Maker – WK2


Pinhole Camera 


Our task involved creating a pin hole camera, this would be used to create an image which would be developed in the dark room in photography. During the week I developed an understanding of what pin hole cameras are and their advantages and disadvantages. Due to their light weight and no cost they are easy to transport and can be used to take images at a considerably low budget. However, the images require long exposure times and if movement occurs it can potentially cause the image to become blurred or completely invisible. I have never produced a pin hole camera or developed photos within a dark room so this was incredibly exciting as I was widening my knowledge within the world of art and design. I was put in a group of 5 all of whom came from different disciplines, this was helpful as we were all able to use our strengths to collectively produce a successful project. As a team we produced a mind map of all our initial ideas, we all listened to everyone’s opinions which  allowed us to quickly produce a variety of different ideas.

mind map.png

We were all particularly interested with the forms that we found within Llandaff cathedral, the pattern and curvatures found on the ceiling of the cathedral inspired how our pin hole camera would look. Its geometric forms were incredibly intriguing and we all agreed that this would be more interesting to use rather than a cylinder or a rectangular camera.

church picschurch.png


glass in church .png

One of the girls within my group had previously created hexagonal nets for another project, we all collectively liked the shape of the 3d hexagonal models and agreed that this could easily represent the geometric forms we wanted to recreate. In order for the pin hole camera to work we had to make sure that the inside of the camera was completely black to stop any reflection that may take place, to do this we took the pin hole camera down to the spray room and spray painted the inside so that all the sides were black. Alongside this we also completely covered the outside of the pin hole camera with duct tape to block any additional light coming through which could damage the image. This has to be done as the photographic paper is light sensitive, therefore if exposed to any additional light it could jeopardise the exposure and quality of the image.

spray paint box

The next thing we needed to do was decorate the outside of the pin hole camera, we all decided on using shiny card on every other hexagonal shape this was to produce a contrast between futuristic and traditional cultural approaches (futuristic environment vs churchyard) Due to the weather we had to postpone taking the photographs until Friday however again due to the weather conditions the university was closed on Friday and the weekend, therefore we were unable to complete the pin hole task as we did not have access to the dark room and the materials required to do so. On Tuesday we all got together and took some photographs with the pin hole camera and used the dark room as the weather was considerably better. The pictures we produced were not the best as they were over exposed however we finally got one image which showed the outline of a tree, this was the best image we obtained.

exposed images


I personally think that our group could have collaborated more efficiently to finish the project more successfully  however I felt that we did not work well as a group.

decorated pin hole

Though my previous experiences within my field projects have been good I found that our group did not glue together as well as I had hoped. I felt as though the group dynamics were not satisfactory as many people completed the work individually and therefore it was hard to communicate to one another. If I was to do this project differently I would ensure that our group communicated more rather than having to produce all the work individually.


Augmented reality:


Alongside producing a pin-hole camera we had a lecture on augmented reality, this is the ability to insert and overlay digital and virtual information into the real world; google and ikea are among a few businesses of whom are using AR to their advantage. I learned that this technology helps to enable users to view the world in a completely different perspective and can even assist users with directions, general information such as the weather and can also recommend places to eat in relation to you location. During this lecture we were able to experiment with AR using the HP reveal app, this is a free app which can be downloaded onto any smart device. It enables me to produce my own augmented reality. I found this incredibly interesting as it allowed me to insert an overlay of different things into my current environment. This is a skill which I can use in the future if I want to present my projects in a unique and stylish way, therefore has helped me to develop a greater understanding into the different technologies which can be used to help me present and communicate my ideas.

hp reveal.png

Ceramics – Field


CERAMICS

My first collaboration was with ceramics, the theme of our small project was “shadow play”. This involved working in a group of 5 from a mixture of disciplines, allowing us to gain a variety of different opinions and capabilities.

Our first task involved finding objects and experimenting with light to create shadows, as a team we worked effectively helping one another to obtain a variety of unique shadows. We experimented using ceramic feet, our own arms, pen lids, pencil cases, water bottle and books, shining the light in different directions enabled us to gain different shadow shapes from the same object. The placement of the light around the object was important as we wanted to produce the most unique shape we could. We were particularly interested in producing deformed arms and feet as the shadows created from the object already looked unusual and edgy. Alongside this we were also experimenting with books, and objects with sharp edges to create spikes which would completely contradict the soft forms of feet.

ceramics - shadows .png

Once we had sketched around the shadows we wanted to use we created model templates of the shadows using card. To do this we each produced one shadow model out of card which allowed us to gain a better understanding of the proposal for our final project. As I have previously produced card models I enjoyed producing the shadow objects as I was confident using the scalpel, as a group we all helped each at this stage.

After discussing what we should name the ceramic work we came up with the theme ‘pins and needles’ , this is due to the contrast of sharp and soft objects and how the action we created would make the individual feel uncomfortable. The next stage to this project was producing our objects in clay, I had never worked with clay and was interested to see whether I was able to produce a similar object to that we designed on the card. Due to its plasticity at the start it made it easy for me to create the spikes required however as it reached the leather hard stage I began to notice that the clay spikes were starting to break. This became a problem however after discussing it with my group I soon realised that I had not scored the spikes deep enough and therefore they were struggling to stick to the main body of the object. This was quickly resolved by scoring both faces deeper which enabled them to tightly fix onto each other. By the end of the week we had all produced a selection of spikes and deformed feet, alongside this we extruded a piece of clay into a long tube which acted like a mobile to hand the feet from. I threaded through 5 pieces of string into the extruded tube and tied the feet to the string to they could hang independently over the spikes.

I really enjoyed working as a team to produce one final ceramic piece, I believe that we all contributed successfully to the group as well as listening and respecting other members of the group’s ideas and opinions. This enabled us to efficiently decide on a shared common goal which is incredibly important to help the group work dynamically. I think this process has allowed me to develop as an interior designer as it has provided me with the skills required to work with designers from all different types of disciplines which is important for when I work on group projects. It has also shown me that problems can be easily solved in a group because someone will always have an idea and that is why I think group work is really important as you are able to produce work which is of a high standard.

Head.png


foot image


FINAL CERAMIC PEICE:
ceramics.png

Model Making


In order to convey the interior space I created alongside using V-ray and Sketch up I created a 1:100 scaled model. This was a very detailed model created using a variety of card including corrugated card and textile fabric. The model required to be exactly to scale, this meant that all the objects which were found within the space needed to be recreated to their exact measurements. At the start of the model making I found it incredibly hard to use the scalpel, as I had only used one once before. I also found it hard to cut the card without creating scuffed edges which made the model look slightly messy, however after multiple attempts I was able to cut the card more efficiently. Once I had cut out all of the components effectively for the model I started to assemble parts together. Before I glued the components together I printed of 1:100 scaled Cole and sons wallpaper, this wallpaper was the exact one used within my sketch up model and therefore completed the model making it look realistic. I used UHU (all-purpose adhesive) to glue the components together, as the glue dried rapidly I had to work fast in order to ensure that they were glued down in the correct place.

I believe that my first attempt at model making was successful and went as well as I expected, I am happy that I was able to overcome the difficult parts of the model making including using the scalpel correctly and being able to scale each object efficiently. If I was to complete the model making process again I would ensure that I used the glue sparingly to reduce the amount excess glue that seeped out of the edges of each component. This process has inspired me to experiment more with model making further to create more contemporary instillations. I have also learned how to produce a scale model which has allowed me to develop skills which are required as an interior designer.


model pictures

model pic 3

Final V-ray render


During the second week of my field project I learned how to render my sketchup model using the programme V-ray. This programme can create different spotlights of light which can allow the interior to come to life and look like a proper space. My interior required different pockets of coloured lights which will come from a rotating night light which will be within the centre of the room. At first I was confused as to how I would project the light from the centre of the room to make it look realistic and as if it was rotating.

After watching a YouTube video on V-ray alongside talking to my tutors I was able to carefully pinpoint areas where I would like the light to be projected from. In addition to personalising where the light was focused I could change the intensity of the light, how concentrated the light was and also the colour of each individual light. As my interior was centred on a child’s bedroom I wanted the colours to be as bold as possible to make it fun, interesting and engaging. One thing which I really liked when using v-ray was that the lights produced shadows around the room from the trees which were located at the front of the space.

This helped produce a very sophisticated and realistic interior. One thing I found difficult was trying to obtain the right angle to take the final render, this was hard to do as I needed to ensure that I included all of the essential parts of the interior within the one render and not forget certain parts of the room. In order to improve I would learn how to take a perfect, sophisticated and detailed final render of my interior to present in my final reviews and to be used in my portfolios.

VRAY .png

Introduction to Sketchup:


Our introduction to Field consisted of developing our object display projects, I learned how to use Sketch up, V-RAY and Photoshop to help create lighting within my interior in order for it to become a life like interior. During my first week I was taught how to produce a sophisticated 3D model on Sketch up, I have never used sketch up before but have used similar software’s such as Solid works. At the start I found it difficult to scale my model to the correct floor plan however after gaining some help I was able to easily do it quickly and efficiently.

After completing 2 sessions in sketch up I had produced a successful model which depict my interior perfectly, with the use of the 3D warehouse (a tool within sketch up) I was able to add detailed pieces of furniture which brought the room to life. I have gained a new confidence within sketch up and it has inspired me to continue playing around with the software to develop my skills further which will hopefully allow me to produce more creative, intricate and sophisticated designs. Though I was able to produce a successful model I struggled with rotating and moving objects within sketch up, this is because the software is incredibly sensitive and therefore made it harder for me to easily move them to their required position.

I YouTubed how to easily move items within the model however continue to struggle, therefore this is something which I will need to practise in order to develop as an interior designer. In addition, for me to become an interior designer I will need to continue to develop my skills further to ensure that I can produce models to a high standard. In other words practise makes perfect and therefore I will need to practise continuously to make sure my skills within sketch up are high.

sketchup model ind.png


untitled.png

Design a site like this with WordPress.com
Get started